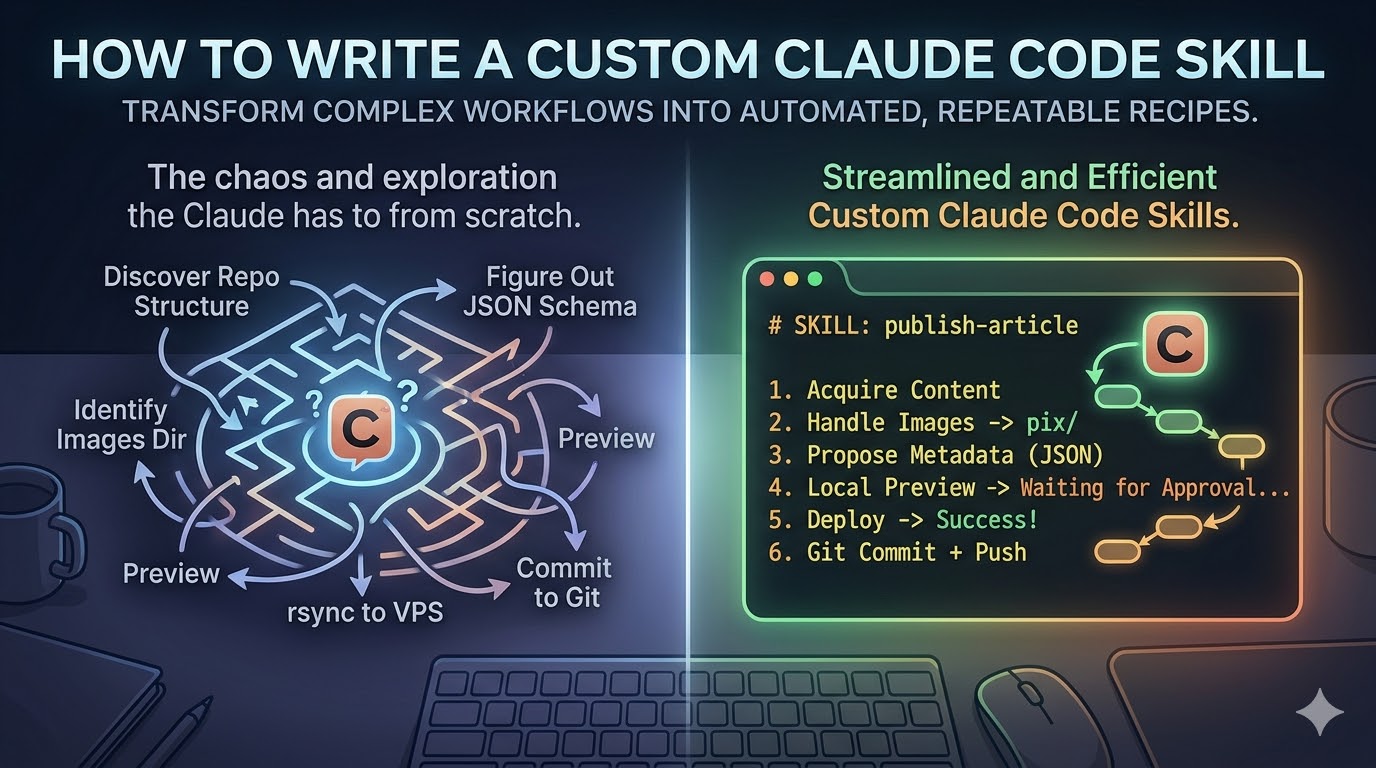
Claude Code can do a lot out of the box, but it doesn't know your workflows. It doesn't know that publishing an article to your website means copying a markdown file to a specific directory, adding an entry to a JSON registry, previewing locally, rsyncing to a VPS, and committing to git. Every time you ask, it has to explore your repo, discover the structure, and figure it out from scratch.
Skills fix this. A skill is a markdown file that teaches Claude a procedure it can follow with the tools it already has. No plugins, no scripts, no MCP servers — just instructions.
Where Skills Live
Claude Code discovers skills from two locations:
- Global (personal):
~/.claude/skills/<skill-name>/SKILL.md— available in every session - Project-scoped:
.claude/skills/<skill-name>/SKILL.md— available only in that project
Each skill is a directory containing a SKILL.md file. The directory name becomes the slash command. So ~/.claude/skills/publish-article/SKILL.md gives you /publish-article.
~/.claude/skills/
  publish-article/
    SKILL.md              # Required entrypoint
    template.md           # Optional supporting files
Anatomy of a SKILL.md
A skill file has two parts: YAML frontmatter for discovery, and markdown content for instructions.
Frontmatter
---
name: publish-article
description: Use when publishing a markdown article to timbeach.com, adding content to the personal website, or when the user says "publish article"
---
Two fields:
- name — letters, numbers, hyphens only. This is what shows up in the skills list.
- description — tells Claude when to use this skill. Start with "Use when..." and describe triggering conditions. Don't summarize what the skill does — just describe when it applies.
The description matters more than you'd think. Claude reads it to decide whether to load your skill for a given task. If the description says "Use when publishing articles" and you say "add this post to my website," Claude connects the dots.
Content
The rest of the file is the procedure Claude follows. Write it like you're explaining the workflow to a competent colleague who's never seen your project before. Be specific about paths, file formats, and the order of operations.
A Real Example: publish-article
Here's a skill I built for publishing markdown articles to my personal website. The site is a vanilla SPA — no build step, no framework. Articles are markdown files in an articles/ directory with metadata in a single articles.json file. Deployment is an rsync to a VPS.
Without this skill, Claude would need to explore the repo every time: read the index.html to understand the rendering pipeline, examine the JSON format, figure out where images go, discover the deploy script. With the skill, it just follows the recipe.
The Full Skill
---
name: publish-article
description: Use when publishing a markdown article to timbeach.com, adding content to the personal website, or when the user says "publish article" or references timbeach.com articles
---
# Publish Article to timbeach.com
Publish a markdown article to timbeach.com from any working directory.
Accepts a file path or inline content.
**Repo:** `~/code/PROJECTS/VULTR_0/sites/timbeach.com`
## Procedure
### 1. Acquire Content
- **File path provided:** Read and validate it has at least one # heading.
- **No file path:** Ask the user for content. Write it to a temp file.
### 2. Handle Images
Scan for  references in the markdown.
For each image found:
1. Resolve path relative to the source file's directory
2. Check if file exists — warn and skip if not
3. Check for name collision in pix/ — ask user: overwrite, rename, or skip
4. Copy image to pix/
5. Rewrite the markdown path to pix/filename.ext
Then ask: "Is there an additional image you'd like to include?"
### 3. Propose Metadata
Infer all fields and present as one block for approval:
"kebab-case-title.md": {
"title": "Inferred from first heading",
"date": "2026-03-18",
"tags": ["suggested", "from", "content"],
"emoji": "suggested-emoji"
}
User approves or tweaks in one shot.
### 4. Write Files
1. Copy markdown (with rewritten image paths) to articles/{filename}.md
2. Update articles/articles.json:
- Read and parse as JSON
- Verify filename key doesn't already exist
- Add new entry
- Write back with 2-space indentation
### 5. Local Preview
Start python3 -m http.server 8000 from the repo directory.
Tell the user to preview. Wait for approval.
### 6. Deploy
Run ./deploy.sh from the repo root. Report output.
If deploy fails, don't proceed to git commit.
### 7. Git Commit + Push
Stage only the specific changed files. Commit and push.
Why This Works
Notice what the skill does and doesn't do:
It gives Claude facts it can't derive quickly. The repo path, the JSON schema, the image path convention, the deploy script's CWD requirement — these are things Claude would have to discover by reading the codebase. The skill front-loads that knowledge.
It sequences the workflow. Preview before deploy. Deploy before commit. Don't commit if deploy fails. This ordering encodes your actual process, not something Claude would guess.
It specifies interaction points. Propose metadata and wait. Preview and wait. These aren't things Claude would naturally pause for — it would just barrel through. The skill makes the human checkpoints explicit.
It doesn't over-specify. The skill doesn't tell Claude how to read a file or how to run a bash command. It already knows how to do that. The skill only teaches what's specific to your workflow.
Writing Your Own
Pick a workflow you repeat. Something where you find yourself explaining the same sequence of steps to Claude across sessions. That's a skill waiting to be written.
Step 1: Map the procedure
Write out every step you'd take manually. Include the file paths, the exact commands, the order. Don't abstract — be concrete. If you cd to a specific directory before running a script because the script uses $PWD, write that down.
Step 2: Identify what Claude can't infer
Separate the steps into two buckets:
- Things Claude could figure out by reading your codebase (how your JSON is structured, what framework you use)
- Things Claude can't easily derive (your preferred workflow order, which fields to propose for approval, where to deploy)
Your skill should focus on the second bucket. Include enough of the first bucket to save Claude the exploration time, but don't document your entire codebase.
Step 3: Define the interaction points
Where should Claude pause and ask you? Metadata approval, preview confirmation, deploy authorization — these are places where your judgment matters and Claude shouldn't just proceed.
Step 4: Write the SKILL.md
Put the frontmatter at the top with a good description. Write the procedure as numbered steps. Be specific about paths and commands. Include error handling for things that actually go wrong (port already in use, file already exists, deploy fails).
Step 5: Test it
Start a new Claude Code session. Run /your-skill-name and see if Claude follows the procedure correctly. If it misses a step or makes wrong assumptions, update the skill and restart.
Tips
Keep it under 500 words if you can. The skill gets loaded into Claude's context. Long skills burn tokens. Write what's necessary, skip what's obvious.
Description is for when, not what. "Use when deploying to production after tests pass" is better than "Runs the deploy pipeline with blue-green switching." Claude needs to know when to reach for the skill, not what it does — that's what the content is for.
Hardcode paths. Skills are your personal tools. Don't parameterize things that never change. If your repo is always at ~/code/myproject, write that path directly.
Include error handling for real failures. Port conflicts, existing files, failed deploys — these actually happen. "Parse error in JSON? Warn and stop" is more useful than pretending everything always works.
Global vs. project-scoped. If the skill only makes sense in one repo, put it in .claude/skills/ in that repo. If you'd use it from anywhere (like publishing articles from whatever directory you're working in), put it in ~/.claude/skills/.